


 Toothess amigurumi (con tutorial)

El tutorial está en inglés. Voy a ponerlo tal y como lo pone en la página:
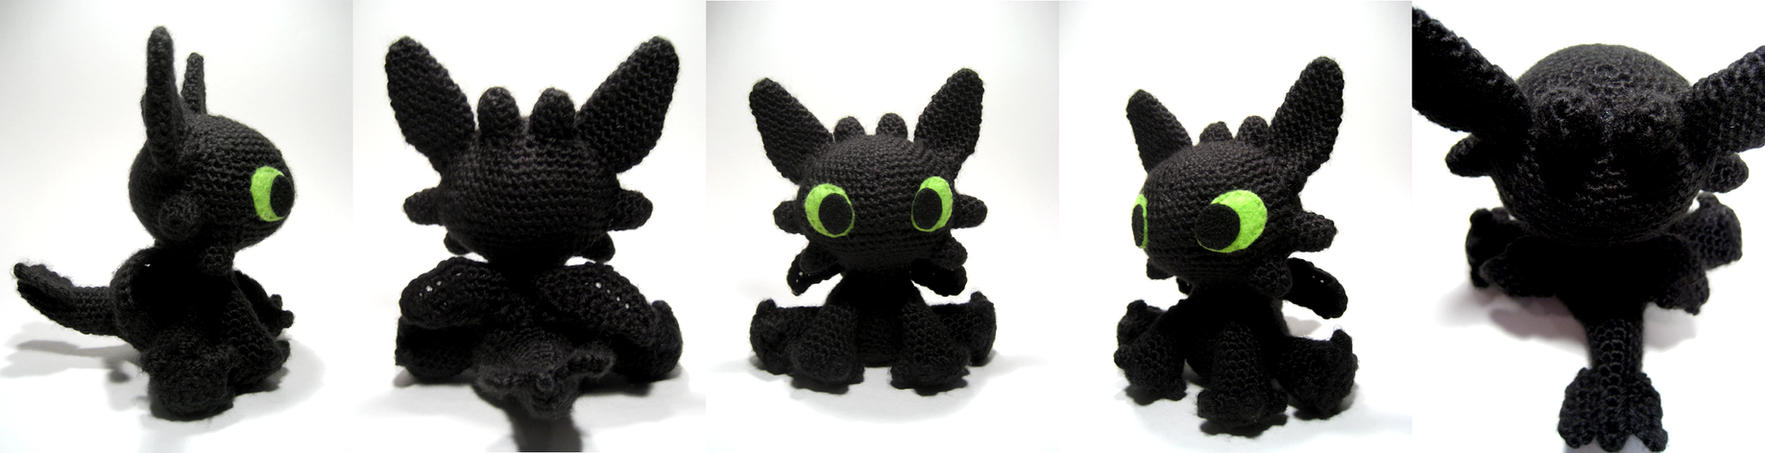
Here is my free pattern for my Toothless amigurumi -- please note that the instructions for the tail and the wings are NOT MINE and I cannot take credit for them. These instructions include everything except for the tail fins, which can be easily improvised. Please feel free to make as many Toothlesses for yourself or for your friends as you like, I only ask that you PLEASE do not produce these to sell for profit, as some parts of the pattern are kindly provided by people other than myself. Thank you for understanding!
I used worsted weight yarn and a size F/3.75 mm hook.
Important: in the instructions for the body, when I say "inc 2,"
I mean single crochet 3 into the same single crochet, so you are
essentially increasing by two stitches in the same stitch instead of
one.
I mean single crochet 3 into the same single crochet, so you are
essentially increasing by two stitches in the same stitch instead of
one.
Body:
R1. MR (6)
R2. Sc 2 in each sc around (12)
R3. (Sc 1, inc 1) 6 times around (18)
R4. (Sc 2, inc 1) 6 times around (24)
R5. (Sc 3, inc 1) 6 times around (30)
R6. (Sc 4, inc 1) 6 times around (36)
R7-8. Sc around
R9. Sc 12, dec 6, sc 12 (this is what shapes Toothless's butt) (30)
R10. Sc around
R11. (Sc 3, dec 1) 6 times around (24)
R12-13. Sc around
R14. (Sc 4, dec 1) 4 times around (20)
R15. Sc around
R16. (Sc 3, dec 1) 4 times around (16)
Fasten off, you don't need to leave a long tail for sewing. Stuff the body.
Head:
R1. MR (6)
R2. Sc 2 in each sc around (12)
R3. (Sc 1, inc 1) 6 times around (18)
R4. (Sc 2, inc 1) 6 times around (24)
R5. (Sc 3, inc 1) 6 times around (30)
R6. (Sc 4, inc 1) 6 times around (36)
R7. Sc around
R8. (Sc 5, inc 1) 6 times around (42)
R9. (Sc 6, inc 1) 6 times around (48)
R10-11. Sc around
R12. Sc 23, inc 2 in next 2 sc, sc 23 (52)
R13. Sc around
R14. Sc 25, inc regularly in the next 2 sc, sc 25. (54)
R15. (Sc 7, dec 1) 6 times around (48)
R16. (Sc 6, dec 1) 6 times around (42)
R17. (Sc 5, dec 1) 6 times around (36)
R18. (Sc 4, dec 1) 6 times around (30)
R19. (Sc 3, dec 1) 6 times around (24)
R20. (Sc 4, dec 1) 4 times around (20)
R21. (Sc 3, dec 1) 4 times around (16)
R22. Sc around
Fasten off and leave a long tail for sewing, then stuff the head. When
you stuff the head, you will need to do a lot of shaping. The
increases in rounds 12 and 14 give Toothless a bit of a point in the
front of his face, but until you stuff and shape the head it looks
pretty weird. I usually put more stuffing in the back of his head, a
bit less in the front, but enough in the point of his "snout" so that
it's clearly there.
I like to sew the body and the head together at this point. He has a
thin little neck so I usually skewer him from head to bottom with a
long knitting needle, it keeps everything in place.
*Toes: To make a toe, HDC 5 in the same st. When you finish the fifth
HDC, remove your hook from the loop, loosen the loop, reinsert your
hook into the first HDC, grab the loop you dropped and pull it through
the first HDC, like a slip stitch, then continue your round.
Front legs (make 2):
R1. MR (6)
R2. Sc 2 in each sc around (12)
R3. (Sc 1, inc 1) 6 times around (18)
R4. In BLO (except for the toes), sc 4, (Make toe*, sc 2) until you
have 4 toes with 2 sc's between each, sc 4.
R5. Sc around. You should still have 18 st. The toes take up a lot of
space and sometimes obscure stitches, especially the stitch right
before the toe, so those are easy to miss. If you have trouble seeing
it, just pull the toe to the left and you should be able to find it.
R6. (Sc 7, dec 1) 2 times around (16)
R7. Sc around
R8. (Sc 6, dec 1) 2 times around (14)
R9. (Sc 5, dec 1) 2 times around (12)
R10-12. Sc around
R13. (Sc 4, dec 1) 2 times around (10)
Fasten off and leave a long tail for sewing.
Back legs (make 2):
R1. MR (6)
R2. Sc 2 in each sc around (12)
R3. (Sc 1, inc 1) 6 times around (18)
R4. In BLO (except for the toes), sc 4, (Make toe*, sc 2) until you
have 4 toes with 2 sc's between each, sc 4.
R5. Sc around.
R6. (Sc 7, dec 1) 2 times around (16)
R7. Sc around
R8. (Sc 6, dec 1) 2 times around (14)
R9-10. Sc around.
Fasten off and leave a long tail for sewing. I prefer to sew the back
legs on before the front legs. When I stuff the front legs, I like to
stuff the bottoms and leave very little stuffing at the top, so the
legs can sit flatter against Toothless's front.
I sew all the way around the circumference of the back legs when
attaching them to the body, but when attaching the front legs I
typically squish the opening and sew the ends together as I sew them
on, if that makes sense. :D It's just another measure to make them
more flat.
Ears (make 2):
R1. MR (6)
R2. Sc 2 in each sc around (12)
R3-4. Sc around
R5. (Sc 2, inc 1) 4 times around (16)
R6-7. Sc around
R8. (Sc 3, inc 1) 4 times around (20)
R9-14. Sc around
R15. (Sc 3, dec 1) 4 time around (16)
R16-17. Sc around
Fasten off and leave a tail for sewing. You don't need to stuff the
ears, just squish them flat and sew them on.
Mini-horns (make 6):
R1. MR (6)
R2. (Sc 1, inc 1) 3 times around (9)
R3-5. Sc around
Fasten off and leave a tail for sewing. Two horns go between the ears
on the top of the head, and two horns on each side of his head.
Tail: I use the instructions from here:
http://mygurumi.blogspot.com/
and usually stop at round 15. You can make it shorter or longer if you
wish.
Here are the instructions for the wings, although I did not write this and I have NOT tested them, the photo I saw looked nice though. (Courtesy of Stitch Bitch)
ch 6, work sc in 2nd ch from hook and the one after it, sc 3 in next ch, sc 1 in each of the next 2 chs; ch1 and turn (7 sc)
sc in first 3 sts, 3 sc in next st, sc in next 3 sts; ch1 and turn (9 sc)
sc in first 4 sts, 3 sc in next st, sc in next 4 sts; ch4 and turn (11 sc)
sc in 2nd ch from hook and next 2 chs, sc in next 5 sts, 3sc in next st, sc in next 5 sts, 3 foundation sc; (19 sc)
ch 1, and turn
sc in next 9 sts, 3 sc in next st, sc in next 9 sts; fasten off (21 sc)
Si quieres aprender desde cero a hacer este tipo de muñequitos amigurumis, encontré una página en la que te explica muy bien cómo hacerlo:

Alina~
No hay comentarios:
Publicar un comentario